How to start editing a marker
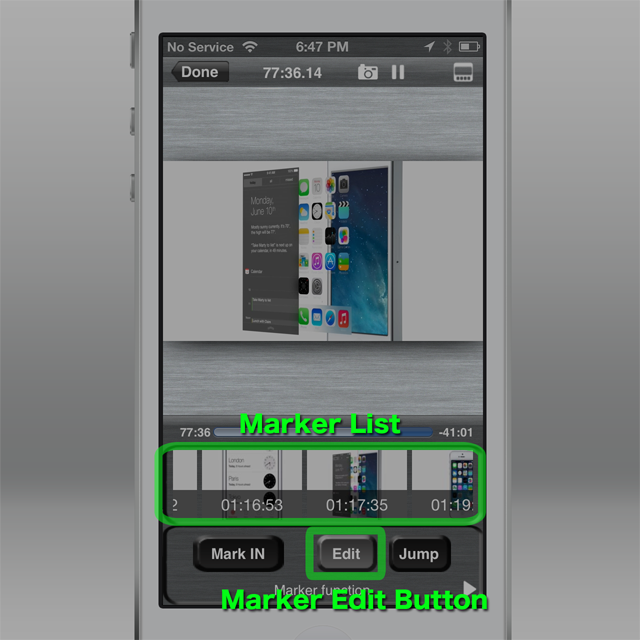
Tap the “Edit” button to start editing a marker, then the Marker List will be displayed.
(Touch the edit button again to hide the Marker List.)
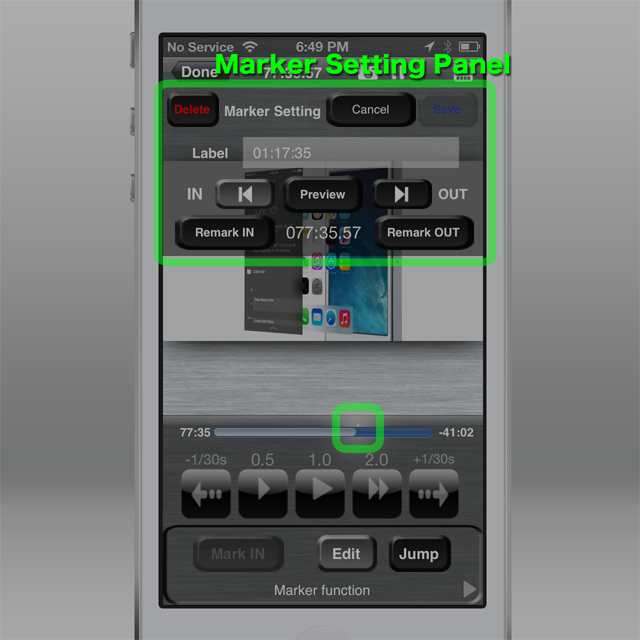
Tap the maker thumbnail you would like to edit, then the Marker Setting Panel will be displayed.
[Tips]
The Marker Setting panel can be moved to where you like by dragging around “Marker Setting” string on the panel. And resizing (zoom in/out) or moving the video is also available by 2-finger operation on the video screen.
Modifying Label name
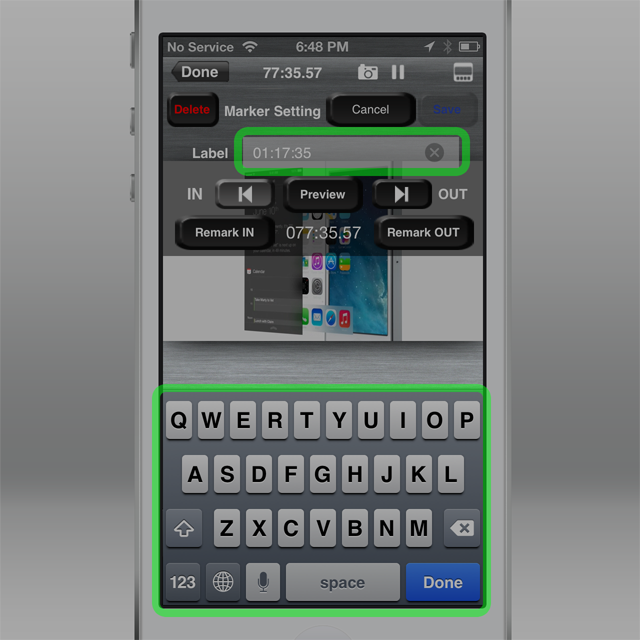
Tapping on the current label string will start “character editing mode” and the keyboard will be shown, then you can edit the label string.
Tap the “Done” button after the change.
Modifying IN/OUT points.
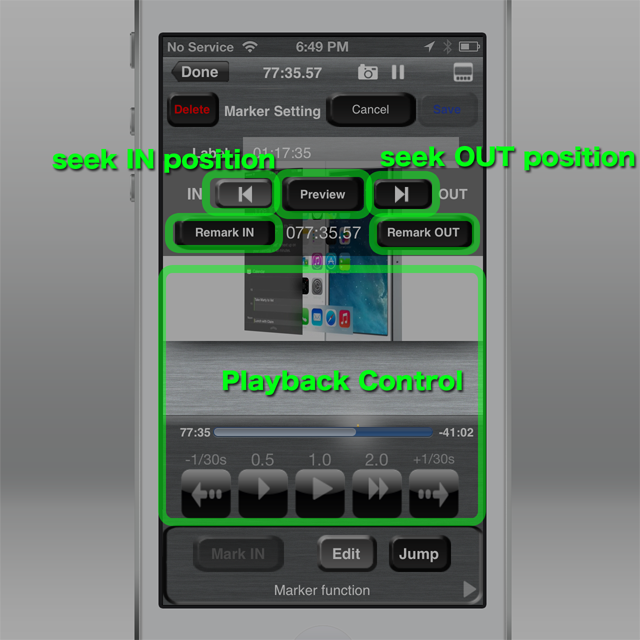
IN point(marker start timing) and OUT point (marker end timing) can be modified by using buttons as follows.
”Preview” Button
will give you “Preview” of the current marker from IN to OUT point.
- Moves to IN point when tapping the button, then starts playing back.
- The playback will stop when reaching to OUT point.
Tapping the Preview button again while previewing can cancel the previewing.
”Move to IN” button
will give you 1 sec preview from IN point.
- Moves to the IN point when tapping the button, then starts playing back.
- Stops the playing back and goes back to the IN point after 1 second.
”Move to OUT” button
will give you 1 sec preview before OUT point.
- Moves to 1 sec before OUT point when tapping the button, then starts playing back.
- Stops the playing back when reaching to the OUT point.
”Remark IN” button
will replace IN point with currently displayed frame at the timing of pressing the button.
When you would like to adjust IN point a little bit forward, please follow the steps below.
- 1. Press “Move to IN” button to move to IN point.
- 2. Adjust the timing by scrubbing.
- 3. Press “Remark IN” button.
- Repeating 1 to 3 will give you more precise IN point.
”Remark OUT” button
will replace OUT point with currently displayed frame at the timing of pressing the button.
When you would like to adjust OUT point a little bit backward, please follow the steps below.
- 1. Press “Move to OUT” button to move to OUT point.
- 2. Press Play button to start playing back.
- 3. Pause whenever you like, then press the “Remark OUT” button.
- 4. Press “Move to OUT” button for preview.
- 5. Scrubbing for IN point adjustment.
- 6. Press “Remark IN” button.
- Repeat 4 to 6 for more precise adjustment.
[Tips]
You can use marker jump function while editing.
[Notes]
The minimum duration from IN to OUT point is 1 sec. When less than 1 sec, the marker will be automatically adjusted to 1sec.
Save/Cancel
”Save” button becomes available only after any changes are made for label, IN point or OUT point. Press “Save” button to save changes of the marker.
You can discard all the changes by “Cancel” button.
Deleting markers
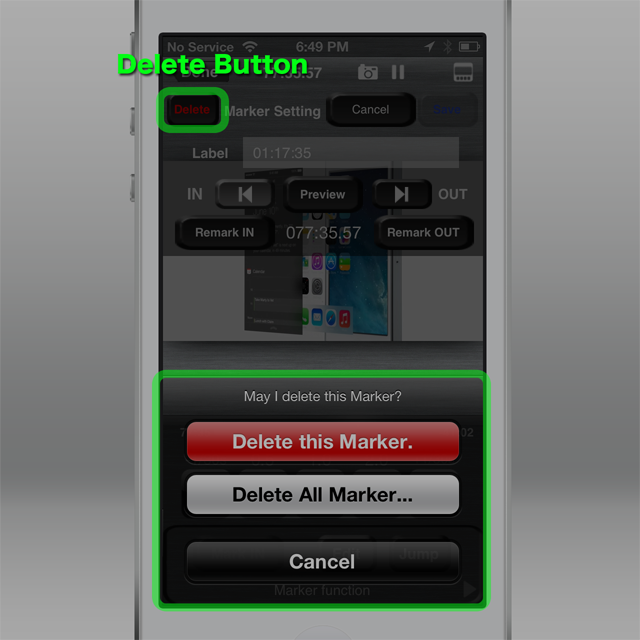
Press “Delete” button to delete registered marker(s).
You can also delete all the registered markers at once.

